
Making your own facial serum at home is easier than you’d expect, and it lets you skip the hefty price tags of fancy bottles at the beauty counter. When you learn how to make facial serum yourself, you control every single drop that goes on your skin, and you can tailor it to exactly what your face needs. With a handful of quality oils and a few active ingredients, you can mix up a nourishing serum in under 15 minutes.
Let’s walk through why the DIY route is worth it, what you’ll need, and how to blend a serum that leaves your skin glowing.
Why Make Your Own Facial Serum?
Store-bought serums can cost a small fortune, sometimes $40 or more for a tiny bottle. The ingredients to make several batches at home often cost less than one of those, so your savings add up fast.
Beyond the price, going DIY means you know precisely what’s in your product. No confusing labels, no fillers you can’t pronounce, and no surprise fragrances that might annoy sensitive skin.
Best of all, you get to customize. Dry, oily, aging, or acne-prone skin all crave different things. When you’re the mixologist, you can build a formula that targets your exact concerns instead of settling for a one-size-fits-all bottle.
Here’s how a serum works in plain terms. A serum is a lightweight, concentrated blend that sinks quickly into the skin and delivers active ingredients deeper than a heavier cream would. That’s why it usually goes on before moisturizer.
Ingredients You’ll Need
The magic of a homemade serum lies in its short, flexible ingredient list. Here’s a solid base recipe, with easy swaps if you’re missing something.
- Carrier oil (2 tablespoons) — This is your base, the oil that carries everything else. Jojoba oil is a favorite because it mimics your skin’s natural oils and suits most skin types. Substitution: Argan oil for extra nourishment, grapeseed oil for oily skin, or rosehip oil for a brightening boost.
- Vitamin E oil (½ teaspoon) — Nourishes skin and acts as a natural preservative, helping your serum last longer. Substitution: Squeeze out one or two vitamin E capsules if you don’t have the bottled kind.
- Vitamin C powder (¼ teaspoon, optional) — A gentle brightening active that can help even out tone. Substitution: Skip it for a simpler serum, or swap in a few drops of a pre-made vitamin C serum.
- Essential oil (3–4 drops total, optional) — Adds targeted benefits and a light scent. Lavender oil soothes, tea tree oil helps blemish-prone skin, and frankincense oil is popular for mature skin. Substitution: Leave it out entirely for fragrance-free skin.
- Hyaluronic acid serum (a few drops, optional) — Draws moisture into the skin for a plump, hydrated look. Substitution: A drop of vegetable glycerin offers a similar hydrating effect.
A quick word on essential oils: they’re potent, so less really is more. Three or four drops per batch is plenty. Too much can leave your skin irritated instead of happy.
Tools and Containers You’ll Need
You won’t need any special equipment for this project. Most of it is probably already in your kitchen or bathroom.
- A small glass bowl for mixing
- A measuring spoon set
- A small funnel (handy for pouring into narrow bottles)
- A clean stirring utensil, like a mini spatula or a glass stirring rod
- A dark glass dropper bottle, ideally amber or cobalt (1–2 oz size)
- Optional: a small kitchen scale for precise measuring
Why a dark glass bottle? Light and air break down active ingredients over time, and tinted glass shields your serum so it stays effective longer. Plastic can react with essential oils, so glass is the safer bet.
Make sure everything is spotlessly clean and completely dry before you start. Any leftover water can invite bacteria and shorten your serum’s life.
How to Make Facial Serum: 9 Step-by-Step
Ready to blend your own serum? Follow these steps and you’ll have a finished bottle in about 15 minutes.
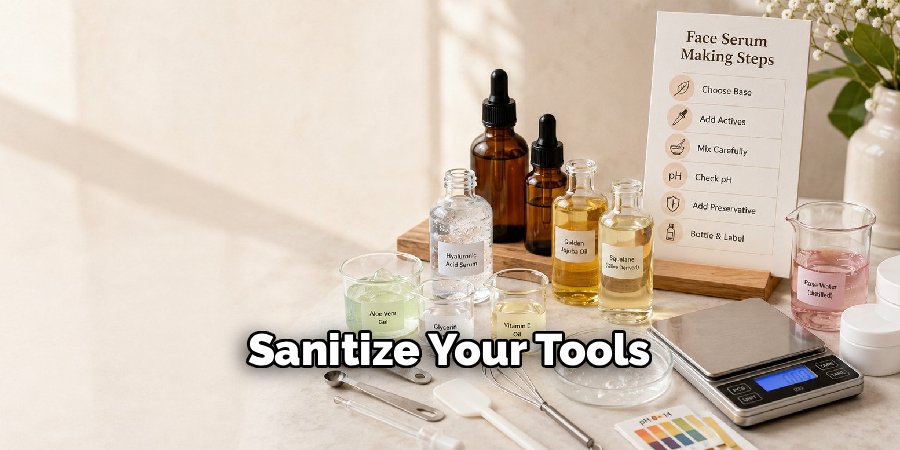
Step 1: Sanitize Your Tools
Wash your bowl, dropper bottle, and utensils with hot soapy water, then rinse well. Let everything air-dry completely, or wipe with a little rubbing alcohol. Clean tools are your first line of defense against spoilage.
Step 2: Measure Your Carrier Oil
Pour your two tablespoons of carrier oil into the glass bowl. This forms the base of your serum and makes up the bulk of the mixture, so measure carefully.
Step 3: Add Vitamin E Oil
Stir in your half teaspoon of vitamin E oil. This ingredient does double duty, nourishing your skin while helping the whole blend stay fresh longer.
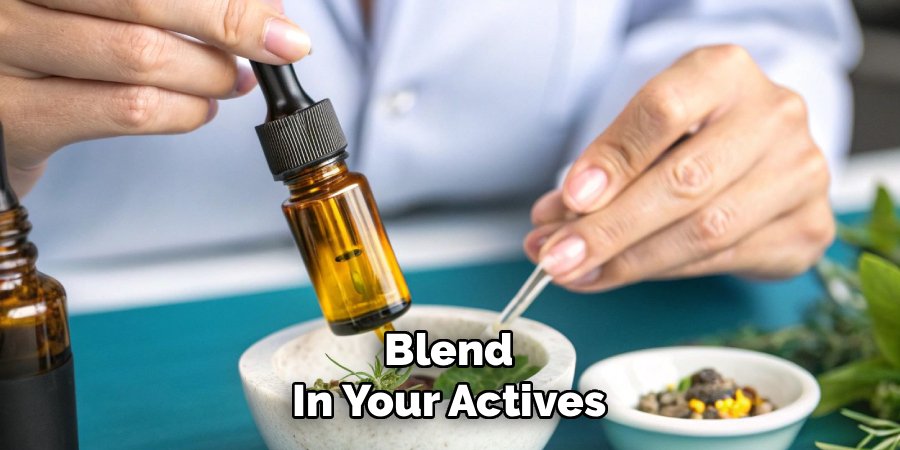
Step 4: Blend in Your Actives
If you’re using vitamin C powder or a hyaluronic acid serum, add them now. Stir slowly and thoroughly so the powder dissolves and everything combines evenly. Take your time here, since active ingredients need to be well mixed to work their best.
Step 5: Add Essential Oils
Drop in your essential oils one at a time, counting as you go. Stick to three or four drops total for a 1–2 oz batch. Give the mixture a gentle stir after each drop.
Step 6: Mix Everything Together
Stir the full blend for about 30 seconds until it looks smooth and uniform. There shouldn’t be any streaks or separated layers at this point.
Step 7: Pour Into Your Bottle
Set your funnel in the neck of the dropper bottle and carefully pour in your serum. Go slow to avoid spills, then cap the bottle tightly.
Step 8: Label and Store
Write the date and ingredients on a small label. This makes it easy to track freshness and remember your recipe if you want to make it again.
Step 9: Patch Test Before Full Use
Before applying your serum all over, do a patch test. Dab a small amount on the inside of your wrist or behind your ear and wait 24 hours.
A quick safety note: If you notice redness, itching, stinging, or any irritation during the patch test, rinse it off and skip the ingredient that caused it. Vitamin C and essential oils are the usual culprits for sensitive skin. This is general beauty-routine advice, not medical guidance, so check with a professional if you have specific skin concerns.
How to Use Your Facial Serum
Once your serum passes the patch test, working it into your routine is simple.
- Cleanse and gently pat your face dry.
- Apply toner first if you use one, and let it absorb.
- Warm two to three drops of serum between your fingertips.
- Press it gently into your skin rather than rubbing hard.
- Follow with your usual moisturizer to lock everything in.
Most people apply serum once or twice a day. If your blend contains vitamin C or other brighteners, morning use pairs nicely with sunscreen. Soothing blends like lavender feel lovely at night.
Customization Ideas
Once you’ve nailed the base recipe, the real fun begins. Here’s how to tweak your serum for your skin’s unique needs.
- For dry skin: Lean on richer oils like argan or rosehip, and add a few drops of hyaluronic acid for a hydration boost. A drop of frankincense adds extra comfort.
- For oily or acne-prone skin: Choose lighter oils like grapeseed or jojoba, which won’t clog pores. A drop or two of tea tree oil can help with the occasional breakout.
- For mature skin: Rosehip and argan oils are prized for their nourishing feel. Frankincense and a touch of vitamin C round out an anti-aging blend.
- For sensitive skin: Keep it simple. Stick to plain jojoba oil and vitamin E, and skip the essential oils and vitamin C powder entirely.
- For scent lovers: Play with soothing lavender, uplifting geranium, or grounding sandalwood. Just stay within that three-to-four-drop limit.
Keep a little notebook of your blends. When you find the combination that makes your skin glow, you’ll want to recreate it exactly next time.
Storage and Shelf Life
Because your homemade serum skips the strong preservatives found in commercial products, it won’t last forever. Storing it well keeps it fresh, effective, and safe to use.
- Keep it cool and dark. Store your bottle away from sunlight and heat, ideally in a cabinet or the fridge. Warmth speeds up spoilage and weakens active ingredients.
- Use the dropper, not your fingers. Dipping fingers into the bottle introduces bacteria. The dropper keeps things sanitary and your serum fresher for longer.
- Watch the shelf life. Most oil-based serums last one to three months. Blends with vitamin C tend to fade faster, so use those within a few weeks for the best results.
- Know the warning signs. If your serum smells rancid, changes color, or looks cloudy or separated in a way that won’t remix, toss it. When in doubt, throw it out.
Making smaller batches more often is a smart move. Fresh serum works better, and a little bottle only takes minutes to whip up again.
Frequently Asked Questions
Is it cheaper to make your own facial serum?
Usually, yes. While the upfront cost of quality oils and dropper bottles might feel like a lot, those ingredients stretch across many batches. A single bottle of jojoba oil can make a dozen serums, which works out far cheaper per bottle than most store-bought options. You also avoid paying for fancy packaging and marketing.
What oil is best for a homemade face serum?
It depends on your skin type. Jojoba oil is the most versatile pick because it suits nearly everyone and closely resembles your skin’s natural oils. Grapeseed oil is great for oily or acne-prone skin since it’s light and won’t clog pores, while argan and rosehip oils are wonderful for dry or mature skin thanks to their rich, nourishing feel.
Can I make a facial serum without essential oils?
Absolutely. Essential oils are completely optional and add scent plus targeted benefits, but they’re also the most common cause of irritation. A serum made from just carrier oil and vitamin E is gentle, effective, and perfect for sensitive skin. Leave them out anytime you want a fragrance-free, no-fuss blend.
How long does homemade facial serum last?
An oil-based serum typically stays fresh for one to three months when stored in a cool, dark spot. Adding vitamin E helps extend that window, since it acts as a natural preservative. If you include vitamin C, use the serum within a few weeks, as that ingredient breaks down quickly. Always trust your senses and toss anything that smells or looks off.
Now that you know how to make facial serum at home, gather your oils and mix up a batch tailored just for your skin, your glow is only 15 minutes away.
