
Learning how to do polygel nails at home comes down to prepping your natural nail, applying a bead of polygel onto a dual form or nail tip, shaping it with a slip solution, and curing it under a UV or LED lamp.
The quick version: buff your nails, brush on a base coat, cure it, then sculpt the polygel into shape before curing, filing, and adding a glossy top coat. Polygel is a hybrid formula that sits between hard acrylic and soft gel, giving you strong, lightweight extensions without the strong fumes. Below you’ll find everything you need, a full step-by-step tutorial, and pro tips for a salon-worthy set at home.
Why Polygel Is a Great Choice for At-Home Nails
Polygel gives you the best of both worlds. It’s stronger and longer-lasting than regular gel polish, yet lighter and easier to control than traditional acrylic.
Because it doesn’t harden until you cure it under a lamp, you get plenty of time to shape and perfect each nail. No rushing, no panic.
It also has very little smell, which makes it far more pleasant to use in a small space at home. Once you learn the basic method, you can create fresh extensions or simply strengthen your natural nails.
What You’ll Need
Gather everything before you start so you’re not searching mid-application. Many kits bundle several of these items together.
- Polygel — The star of the show, a putty-like formula that comes in a tube.
- Slip solution — A liquid that stops the polygel from sticking to your brush while you shape it.
- Dual forms — Clear molds shaped like nail tips that help you sculpt the extension.
- Nail tips (optional) — An alternative to dual forms if you prefer applying tips directly.
- Dehydrator and primer — Preps the nail so the product grips and lasts longer.
- Base coat and top coat — A gel base for adhesion and a top coat for shine and seal.
- UV or LED lamp — Cures (hardens) each layer of product with light.
- Nail file and buffer — For prepping, shaping, and smoothing.
- Cuticle pusher — To gently push back the skin at the base of your nail.
- Dual-ended polygel brush and spatula tool — The spatula scoops product, the brush shapes it.
- Lint-free wipes and rubbing alcohol — To clean up the tacky layer after curing.
Quick safety note: before using any new nail product, dab a small amount on the inside of your wrist and wait a day to check for redness or itching. This patch test matters most with primers and gels, since these liquids sit against your skin. Also try not to let uncured polygel or slip solution touch the skin around your nails, as repeated contact can cause irritation over time.
How to Do Polygel Nails: 10 Step-by-Step
Take it slow the first time. Working one nail at a time keeps things tidy and gives you room to shape each extension properly.
Step 1: Prep Your Natural Nails
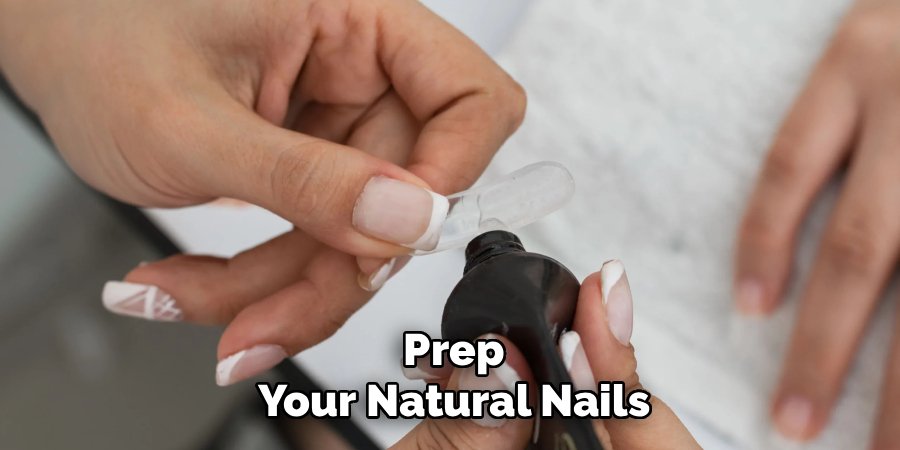
- Remove any old polish and wash your hands.
- Gently push back your cuticles (the skin at the base of the nail) with a cuticle pusher.
- Lightly buff the surface of each nail with a buffer until the shine is gone.
- Wipe away the dust with a lint-free wipe and a little rubbing alcohol.
Buffing creates a slightly rough surface so the product has something to grip. Don’t overdo it, though. A few light passes is all you need to protect your natural nail.
Step 2: Dehydrate and Prime
- Brush on a thin layer of nail dehydrator to remove excess oil and moisture.
- Follow with a coat of primer and let it dry for a few seconds.
This step is easy to skip, but don’t. Dehydrating and priming are what stop your extensions from lifting or popping off after a couple of days.
Step 3: Apply and Cure Your Base Coat
- Paint a thin layer of gel base coat over each nail.
- Keep it off the skin and cuticle line.
- Cure it under your UV or LED lamp for the time listed on your product (usually 30 to 60 seconds).
The base coat acts like glue between your natural nail and the polygel. A thin, even layer works far better than a thick one.
Step 4: Fit Your Dual Form
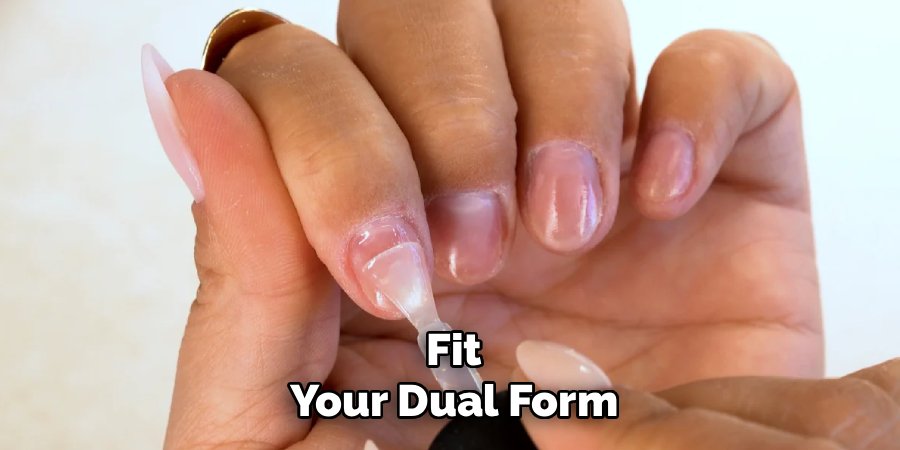
- Hold a dual form up to your nail to find the size that matches your nail bed.
- File the sides down slightly if it’s a touch too wide.
- Set the right size aside for each finger so you’re ready to go.
Dual forms are clear molds that let you build the nail shape from underneath. Getting the fit right now saves you filing time later.
Step 5: Scoop and Place the Polygel
- Squeeze a bead of polygel onto the dual form, roughly the size you want the finished nail.
- Dip your brush into the slip solution so the product won’t stick to it.
- Gently pat and spread the polygel until it covers the form evenly.
The slip solution is the trick that makes polygel easy to control. Keep your brush lightly wet and use soft, patting motions rather than dragging.
Step 6: Press On and Shape
- Place the loaded dual form onto your natural nail at a slight angle.
- Press down firmly and hold for a few seconds, guiding the product toward the cuticle.
- Wipe away any polygel that squeezes out onto your skin before it cures.
Take your time to line the form up straight. A crooked start means a crooked nail, so adjust before you move on.
Step 7: Cure, Then Remove the Form
- Cure the nail under your lamp for the recommended time, usually 60 seconds.
- Gently peel the dual form away once it’s hard.
- Repeat steps 5 through 7 for each remaining nail.
You’ll feel the nail is solid before you peel the form. If any spot still feels soft or sticky, pop it back under the lamp for a few more seconds.
Step 8: File and Shape Your Extensions
- Use a nail file to shape the free edge into your favorite look, such as square, round, or almond.
- Refine the sides and smooth the surface with a buffer.
- Wipe off all the dust with a lint-free wipe.
This is where your set really comes together. File slowly and check both hands often so your nails match in length and shape.
Step 9: Seal With Top Coat
- Brush a thin layer of top coat over each nail, wrapping it slightly around the free edge.
- Cure under the lamp one final time.
- Wipe away the sticky residue with a lint-free wipe and rubbing alcohol if your top coat leaves a tacky layer.
The top coat locks everything in and gives that glossy, salon-finish shine. Sealing the free edge helps your polygel nail extensions last longer.
Step 10: Nourish Your Cuticles
- Massage a drop of cuticle oil into the skin around each nail.
- Rub it in gently until it absorbs.
This final touch hydrates the skin and gives your whole manicure a healthy, finished look. Keep the oil handy and use it daily to keep your set looking fresh.
Pro Tips for a Flawless Polygel Set
A few small habits make your polygel application look far more professional.
- Work one nail at a time. Polygel won’t harden until you cure it, so there’s no rush, but finishing each nail fully keeps you organized.
- Keep your brush lightly wet, not soaked. Too much slip solution makes the product runny and harder to shape. A thin coat on the brush is enough.
- Build a thin apex. The apex is the slightly raised high point in the center of the nail that gives it strength. Aim for a subtle curve, not a big bump.
- Cure for the full time. Undercured polygel can lift or feel bendy. Always follow the timing on your lamp and product.
- File in one direction near the edges. This keeps the free edge smooth and helps prevent peeling.
Common Mistakes to Avoid
Even an easy method has a few traps. Here’s what to watch out for.
Skipping the prep steps. Buffing, dehydrating, and priming are what keep your extensions attached. Skip them and your nails may lift within days.
Using too much product. A giant bead of polygel is hard to shape and looks bulky. Start with a smaller amount and add more if you need it.
Letting product touch your skin. Polygel and slip solution on the cuticle line lead to lifting and can irritate the skin. Wipe away any overflow before curing.
Applying thick layers. Thick coats of base or top coat may not cure all the way through. Thin, even layers cure better and last longer.
Ripping off your nails. Never peel or force a polygel set off, since this can take layers of your natural nail with it. Always soak or file them off properly.
Frequently Asked Questions
How long do polygel nails last?
With good prep and proper sealing, polygel nails typically last about three to four weeks. As your natural nail grows out, you’ll see a small gap at the base, which is the usual sign it’s time for a fill or a fresh set. To get the most wear, seal the free edge with top coat, avoid using your nails as tools, and apply cuticle oil daily to keep the skin healthy.
Is polygel better than acrylic or gel?
It depends on what you want, but polygel is a popular middle ground. It’s lighter and less smelly than acrylic, and stronger and longer-lasting than regular gel polish. Because it doesn’t harden until you cure it under a lamp, it’s also more beginner-friendly, giving you plenty of time to shape each nail. If you want durable extensions that are gentle to work with at home, polygel is a great pick.
Can you do polygel nails without a UV or LED lamp?
No, a lamp is essential. Polygel only hardens, or cures, when exposed to UV or LED light, so it will stay soft and unusable without one. This is actually part of what makes the product so easy to work with, since it gives you unlimited time to shape before you cure. If you’re buying a kit, check that it includes a lamp or plan to buy one separately.
How do you remove polygel nails safely?
The safest way is to file down the top layer, then soak your nails in acetone wrapped in foil, or file the rest off gently. Never peel or pry a set off, as this can damage the surface of your natural nails. Once removed, buff lightly, wash your hands, and massage in plenty of cuticle oil to rehydrate the skin and nails before your next set.
Ready to Sculpt Your First Set?
Grab your kit, take it one nail at a time, and enjoy the process. With a little practice, doing your own polygel nails will feel easy, and you’ll have strong, glossy extensions to show for it.
