
To apply red lipstick, start by exfoliating and moisturizing your lips, line them with a matching lip liner, then fill in the color with a lip brush and blot for a long-lasting finish. Learning how to apply red lipstick the right way keeps the color crisp, stops it from bleeding, and gives you that bold, confident pout that stays put for hours.
A great red lip can pull a whole look together in seconds. The trick isn’t just the shade you pick — it’s how you prep, line, and lock it in. Below, we’ll cover exactly what to grab and walk through each step so you get a clean, flattering finish every single time.
What You’ll Need
You don’t need a full pro kit to nail a red lip. A few key items make all the difference between messy and magazine-worthy.
- Lip scrub — a gentle exfoliator that buffs away dry, flaky skin so color goes on smoothly. You can also use a soft toothbrush.
- Lip balm — a hydrating balm to soften and prep your lips before color. Let it sink in first.
- Lip liner — a pencil that matches your red shade, used to outline and shape your lips. This is your secret weapon against smudging.
- Red lipstick — your star product. A creamy formula is forgiving for beginners, while a matte (flat, non-shiny finish) lasts longer.
- Lip brush — a small, firm brush that lets you paint color precisely into corners and edges.
- Concealer — a light-covering product to clean up the outline and make the red pop against a neutral base.
- Setting powder — a fine, translucent powder used to “set” (lock in) the color so it doesn’t move.
- Cotton swabs — perfect for fixing tiny mistakes without wiping the whole thing off.
- A single-ply tissue — for blotting between layers.
Once your kit is ready, let’s get into the technique.
10 Step-by-Step: How to Apply Red Lipstick
Follow these steps in order. The full routine takes about five to eight minutes, and it gets faster once you’ve done it a few times.
Step 1: Prep and Exfoliate Your Lips
Red is a bold, high-visibility shade, so it shows every dry patch. Gently buff your lips with a lip scrub or a soft toothbrush in small circles for about 20 seconds.
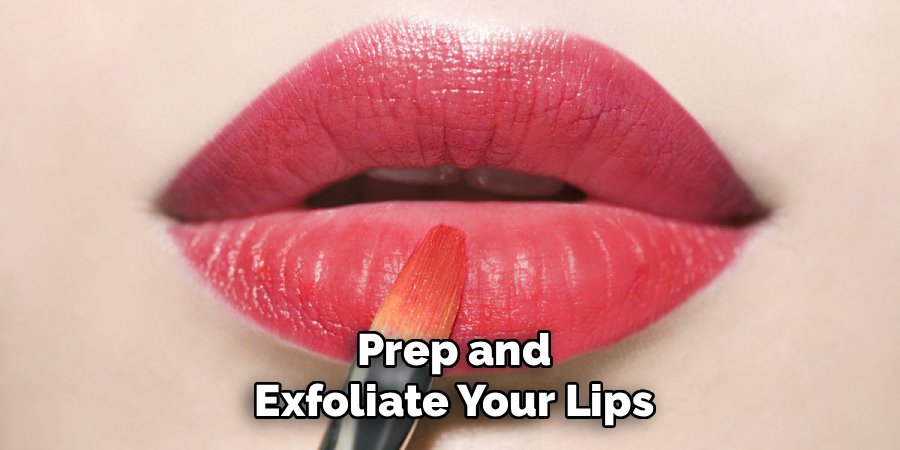
Wipe away the flakes with a damp cloth. Smooth lips are the foundation of a clean red lip, so don’t skip this part.
Safety note: This is general beauty guidance, not medical advice. If you’re trying a new product, dab a little on your inner wrist and wait 24 hours to check for redness or irritation before putting it on your lips. Skip exfoliating entirely if your lips are cracked or sore.
Step 2: Hydrate and Let It Absorb
Swipe on a thin layer of lip balm and give it a minute or two to sink in. Hydrated lips keep the color from settling into fine lines.
If your lips still feel greasy, gently press a tissue over them. You want moisture, not a slippery surface that makes lipstick slide around.
Step 3: Prime With Concealer
Lightly tap a small amount of concealer over your lips using your finger or a brush. This neutralizes your natural lip tone so the red shows up true to color.
Keep the layer thin — too much can cause the lipstick to slip or crease. This step also gives the color something to grip.
Step 4: Line Your Lips
Take your lip liner and start at the little dip in your upper lip, known as the Cupid’s bow. Draw small, feathered strokes to outline the shape rather than one heavy line.
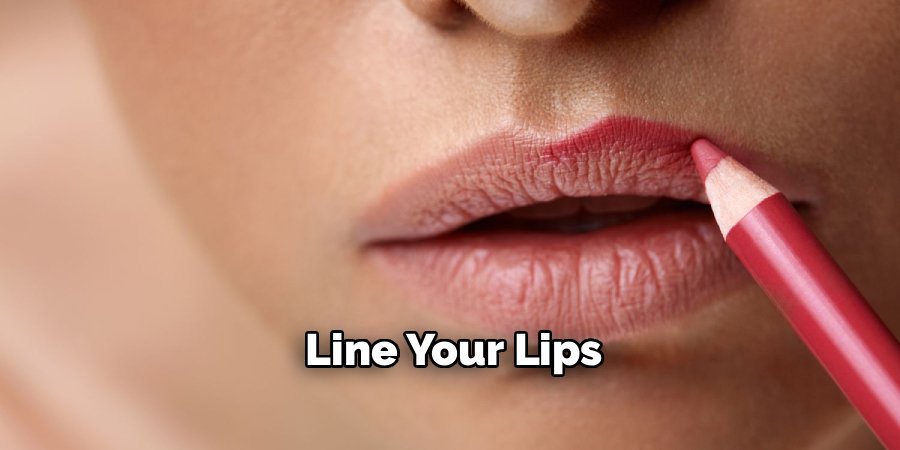
Then move to the outer corners and connect your outline all the way around. Working slowly here keeps everything symmetrical and gives you a crisp border.
Step 5: Fill In With Liner
Once your outline is done, lightly color in your entire lip with the same liner. This creates a base layer that grips the lipstick and helps it last much longer.
If your red bleeds later in the day, at least the liner underneath keeps some color in place. Think of it as insurance for your pout.
Step 6: Apply the Red Lipstick
Now for the fun part. Use a lip brush to paint on your red lipstick, starting in the center and working outward toward the corners.
A brush gives you far more control than applying straight from the bullet, especially around the edges. Fill in evenly and stay just inside your liner so the color and outline blend together.
Step 7: Blot and Layer
Press a single-ply tissue gently against your lips to blot away excess oils. This removes the top layer that tends to transfer or smudge.
Then apply a second thin coat of lipstick. Blotting between layers is the classic trick for a red that survives coffee, meals, and long days.
Step 8: Set the Color
Hold a tissue over your lips and dust a tiny bit of setting powder on top through the tissue. The powder passes through and mattifies the surface without dulling the shade.
This locks everything in for a smudge-resistant finish. Use a light hand — too much powder can look chalky.
Step 9: Clean Up the Edges
Dip a cotton swab in a little concealer and trace around the outside of your lips. This sharpens the border and instantly makes the red look more polished.
Fix any small slips or uneven spots here. A clean edge is what separates a rushed red from a flawless one.
Step 10: Final Check
Smile, then check your teeth. Red lipstick loves to sneak onto teeth, so pop a clean finger in your mouth, close your lips around it, and pull it out to catch any excess.
Give your look one last glance in good lighting and you’re ready to go.
Pro Tips
A few small habits take your red lip from good to genuinely long-lasting. Keep these in mind.
- Match your liner to your lipstick. A liner that’s too dark creates an obvious ring as the color wears off. Aim for the closest shade you can find.
- Pick your undertone. Blue-based reds make teeth look whiter, while orange or warm-based reds flatter deeper and tanned skin tones. Play around to find your best match.
- Do a patch test with new formulas. Before wearing a brand-new lipstick all day, dab a bit on your inner arm and wait a day to rule out irritation.
- Carry the liner for touch-ups. A quick swipe of liner mid-day revives the color without the mess of reapplying full lipstick.
- Overline gently for fuller lips. Draw just slightly outside your natural line for a plumper look, but stay close so it still looks natural.
Common Mistakes to Avoid
Even a bold red is easy to get right once you dodge these common traps.
- Skipping lip prep. Applying red over dry, flaky lips highlights every rough patch. Always exfoliate and hydrate first.
- Applying straight from the tube. The bullet is bulky and hard to control on such a visible shade. A lip brush gives you cleaner edges.
- Using too much product. Thick layers crease, transfer, and slide. Thin coats that you build up always look better and last longer.
- Forgetting to blot. Blotting between layers is what keeps your red in place. Skip it and you’ll be reapplying all day.
- Ignoring the outline. A shaky or missing lip line is the fastest way to look messy. Take your time lining before you fill.
- Not checking your teeth. Red on your teeth is the classic slip-up. Always do the finger trick before you head out.
Frequently Asked Questions
How do I keep red lipstick from smudging and bleeding?
The secret is layering and setting. Line and fill your entire lip with liner first, apply thin coats of lipstick, and blot between each one. Finish by dusting a little setting powder through a tissue to lock the color in place. For extra staying power, clean up the outer edges with concealer, which creates a barrier that stops the red from feathering into fine lines around your mouth.
What shade of red lipstick suits my skin tone?
There’s a red for everyone — it just comes down to undertones. Cool, fair skin tends to glow with blue-based or berry reds, while medium and olive tones look lovely in true reds and warm brick shades. Deeper skin tones can carry rich, warm reds and even darker wine hues beautifully. When in doubt, blue-based reds are the most universally flattering and have the bonus of making teeth look brighter.
Do you need lip liner to apply red lipstick?
You don’t absolutely need it, but liner makes a huge difference with a bold shade like red. It sharpens your lip shape, stops the color from bleeding, and gives the lipstick a base to grip so it lasts longer. If you’re going for a crisp, long-wearing red, liner is well worth the extra 30 seconds. For a softer, more casual look, you can skip it and simply pat the color on with your finger.
How do you make red lipstick last all day?
Prep is everything for long wear. Start with exfoliated, hydrated lips, prime with a touch of concealer, and fill your lips with liner before the lipstick goes on. Apply the color in thin layers, blotting and reapplying, then set it with a light dusting of powder. Choosing a matte or long-wear formula also helps. With this routine, your red should easily make it through most of the day with only minor touch-ups.
Grab your favorite red, follow these steps, and get ready to turn heads with a bold, flawless pout.
