
Learning how to use magnetic nail polish is simple: paint on a base coat, apply the magnetic polish, then hold a small magnet over each wet nail for a few seconds to pull the metal particles into a shimmery pattern.
Seal it with a top coat and you’re done. This special polish contains tiny magnetic flecks that react to a magnet, creating a moving, 3D shine that looks far more complex than the effort it takes. Below you’ll find everything you need, a full step-by-step guide, and pro tips for a flawless finish at home.
Why Magnetic Nail Polish Is So Fun to Use
Magnetic polish gives you a high-impact look with almost no artistic skill required. The magnet does the design work for you, so there’s no steady hand or nail art talent needed.
The finished effect shifts and shimmers as you move your hand, catching the light in a way regular polish never does. It feels like a little bit of magic every time.
Best of all, most magnetic polishes come with their own magnet, so you don’t need a pile of extra tools. If you can paint a normal coat of polish, you can pull off this look.
What You’ll Need
Gather everything before you start so nothing dries before you’re ready. Many sets bundle the polish and magnet together.
- Magnetic nail polish — The star of the show, packed with tiny metallic particles that respond to a magnet.
- Magnet tool — Often built into the polish cap, or sold separately with different pattern shapes.
- Base coat — Protects your natural nail and helps the color grip.
- Top coat — Seals the design and adds shine and staying power. Use a gel top coat if you’re using gel polish.
- UV or LED lamp (only for gel formulas) — Cures, or hardens, gel layers under light.
- Nail file and buffer — For shaping and smoothing before you paint.
- Cuticle pusher — To gently push back the skin at the base of your nail.
- Cuticle oil — To hydrate the skin around your nails when you’re finished.
- Cotton pads and nail polish remover — For cleaning up any mistakes around the edges.
Quick safety note: before trying a new polish or product, dab a tiny amount on the inside of your wrist and wait a day to check for redness or itching. This patch test matters most if you have sensitive skin or a history of reactions to nail products.
How to Use Magnetic Nail Polish: 9 Step-by-Step
Work one nail at a time, since the magnetic effect only forms while the polish is still wet. Rushing across all ten nails at once usually means a few dry before you can use the magnet.
Step 1: Prep Your Nails
- Remove any old polish and wash your hands.
- Gently push back your cuticles (the skin at the base of the nail) with a cuticle pusher.
- Lightly buff the surface of each nail with a buffer to remove shine.
- Shape the free edge with a nail file to your liking.

Clean, dry nails give the polish the best surface to stick to. A quick buff helps everything last longer without lifting.
Step 2: Apply Your Base Coat
- Brush a thin layer of base coat over each nail.
- Keep it off the skin and cuticle line.
- Let it dry fully, or cure it under your lamp if you’re using a gel base.
The base coat acts like a primer between your natural nail and the color. It also helps prevent staining, which some darker polishes can cause.
Step 3: Paint the First Coat of Magnetic Polish
- Apply one thin, even layer of magnetic nail polish.
- Cover the whole nail in smooth strokes from base to tip.
- Don’t use the magnet yet on this first layer.
This first coat builds your color foundation. Keeping it thin helps the second coat show off the magnetic pattern more clearly.
Step 4: Cure or Dry the First Coat
- If you’re using a gel formula, cure this layer under your UV or LED lamp for the time on the label.
- If you’re using a regular formula, let it dry until it’s no longer tacky.
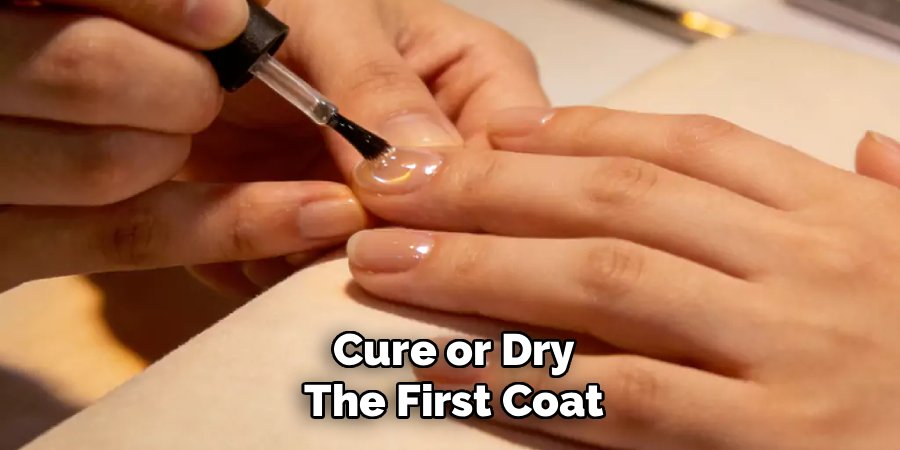
The magnetic effect works best on your second coat, so treat this one as a plain base layer. Getting it fully set first keeps your final design crisp.
Step 5: Apply the Second Coat, One Nail at a Time
- Paint a second thin layer of magnetic polish on a single nail.
- Work on just one finger before moving on.
- Keep the polish wet, because the magnet only works while it’s still liquid.
This is the layer that becomes your shimmery design. Speed matters here, so have your magnet ready before you brush this coat on.
Step 6: Hold the Magnet Over the Wet Polish
- Hold the magnet tool close to the nail, about a quarter inch above the surface, without touching it.
- Keep it steady for 5 to 15 seconds while the metallic particles pull into a pattern.
- Angle the magnet at the base of the nail for a classic “cat eye effect,” a bright glowing stripe that looks like a cat’s eye.
The particles shift toward the magnet, forming that eye-catching line or swirl. Try tilting the magnet at different angles to see which look you like best.
Step 7: Cure or Dry This Coat
- Cure gel polish under your lamp right away to lock the pattern in place.
- For regular polish, let it dry without touching it so the design stays put.
Once this layer sets, your magnetic pattern is permanent for the life of the manicure. Repeat steps 5 through 7 on each remaining nail.
Step 8: Seal With Top Coat
- Brush a thin layer of top coat over each nail, wrapping it slightly around the free edge.
- Cure it under your lamp if it’s a gel top coat, or let it air-dry for a regular one.
The top coat protects your design and boosts that glossy shine. Sealing the tip edge helps your manicure resist chips.
Step 9: Nourish Your Cuticles
- Massage a drop of cuticle oil into the skin around each nail.
- Rub it in gently until it absorbs.
This final touch hydrates your skin and gives the whole manicure a polished, finished look. Use the oil daily to keep everything looking fresh.
Pro Tips for a Flawless Magnetic Manicure
A few small habits make a big difference in how sharp your design turns out.
- Keep the polish wet for the magnet. The effect only forms while the coat is liquid, so never let it start drying before you use the magnet.
- Don’t let the magnet touch the nail. Resting it on wet polish can smudge or dent the surface. Hover just above instead.
- Experiment with angles. Holding the magnet flat, tilted, or off to one side creates totally different patterns. Play around on one nail to find your favorite.
- Use two coats for depth. A single coat often looks flat. The second coat over a dried first coat gives the richest, most dimensional shimmer.
- Steady your hand. Rest your elbow on the table while holding the magnet so it doesn’t wobble. A steady magnet means a crisper line.
Common Mistakes to Avoid
Even an easy technique has a few traps. Here’s what to watch out for.
Using the magnet on dry polish. If the coat has already started to set, the particles won’t move. Always apply the magnet within seconds of painting.
Painting too thick. A heavy coat takes longer to dry and can look gloopy. Thin layers give a cleaner pattern and cure more evenly.
Skipping the base coat. Without it, darker magnetic shades can stain your natural nails and the color may lift sooner.
Doing all ten nails at once. The polish dries too fast for that. Finish each nail, magnet and all, before starting the next.
Forgetting the top coat. An unsealed design chips quickly and loses its shine. Always finish with a protective layer wrapped around the edge.
Frequently Asked Questions
How long does magnetic nail polish last?
With a good base and top coat, regular magnetic polish usually lasts about five to seven days before chipping, while gel magnetic polish can last two to three weeks. To get the most wear, seal the free edge with top coat, avoid using your nails as tools, and apply cuticle oil daily. The magnetic pattern itself won’t fade, so your nails keep that shimmer right up until you remove them.
Can you use magnetic nail polish without the special magnet?
You really do need a magnet, but it doesn’t have to be the exact one from the set. Any strong magnet can move the metallic particles, though the shape of the magnet affects the pattern you get. That said, the magnet included with your polish is designed to sit at the right distance and angle, so it usually gives the cleanest cat eye effect. If yours didn’t come with one, look for a magnetic wand made for nails.
What is the cat eye effect in magnetic nail polish?
The cat eye effect is a bright, glowing stripe of shimmer that runs across the nail, looking a bit like the slit pupil in a cat’s eye. It forms when you hold the magnet at an angle over the wet polish, pulling the metallic flecks into a concentrated line of light. Moving the magnet’s position changes where the stripe lands, so you can center it, curve it, or place it at the base of the nail. It’s the most popular look people create with magnetic polish.
Is magnetic nail polish safe to use at home?
Yes, magnetic polish is used just like any other nail polish and is safe for at-home use when you follow the instructions. Work in a well-ventilated space, keep the polish off your skin and cuticles, and do a quick patch test first if you have sensitive skin. Avoid applying it to damaged or irritated nails, and always remove polish gently rather than peeling it off. If you ever notice redness or irritation, stop using the product.
Ready to Add Some Shimmer?
Grab your polish and magnet, take it one nail at a time, and have fun experimenting with angles. With a little practice, you’ll be creating that mesmerizing cat eye shine like a pro.
