

Learning how to apply false eyelashes comes down to five things: trim the lash to fit, add a thin line of glue, wait for it to get tacky, press it along your lash line from the center out, and blend it in with liner. With a little practice, you can go from fumbling to flawless in under five minutes. Below, you’ll find a complete step-by-step walkthrough, the tools you need, and the fixes for every common slip-up.
False lashes look intimidating at first, but they’re honestly one of the easiest ways to open up your eyes and pull a whole look together. Whether you’re prepping for a big night out or just want your everyday makeup to pop, mastering this skill is worth it. Let’s break it down so your next set goes on smooth and stays put all day.
What You’ll Need
Gather everything before you start so you’re not scrambling mid-application with glue drying on your fingers. Here’s your kit:
- False eyelashes — pick a style that suits the occasion. Natural, wispy strip lashes are great for beginners, while dramatic volume lashes work for events.
- Lash glue — a good latex-free lash adhesive holds all day and is gentler on sensitive eyes. Clear-drying formulas hide mistakes best.
- Tweezers — precision slant or curved tweezers give you way more control than fingers for placing the lash.
- Small scissors — sharp cuticle or nail scissors work perfectly for trimming lashes to fit your eye.
- Eyelash curler — an eyelash curler helps your natural lashes blend with the falsies.
- Mascara — a coat of volumizing mascara on your real lashes gives the falsies something to grip.
- Eyeliner — a liquid or gel eyeliner hides the lash band and creates a seamless finish.
- Mirror — a magnifying makeup mirror makes precise placement so much easier.
- Cotton swabs — handy for cleaning up stray glue.
A quick note on the glue: since it goes right next to your eyes, always check the label for latex if you have sensitivities. When trying a new adhesive, dab a tiny bit on the back of your hand and wait a few minutes to make sure your skin doesn’t react.
8 Step-by-Step: How to Apply False Eyelashes
Follow these steps in order and don’t rush the drying time. That’s where most people go wrong.
Step 1: Do Your Eye Makeup First
Finish your eyeshadow, and if you use eyeliner, lay down your base line now. Doing your shadow first means you won’t knock loose lashes while blending powders.
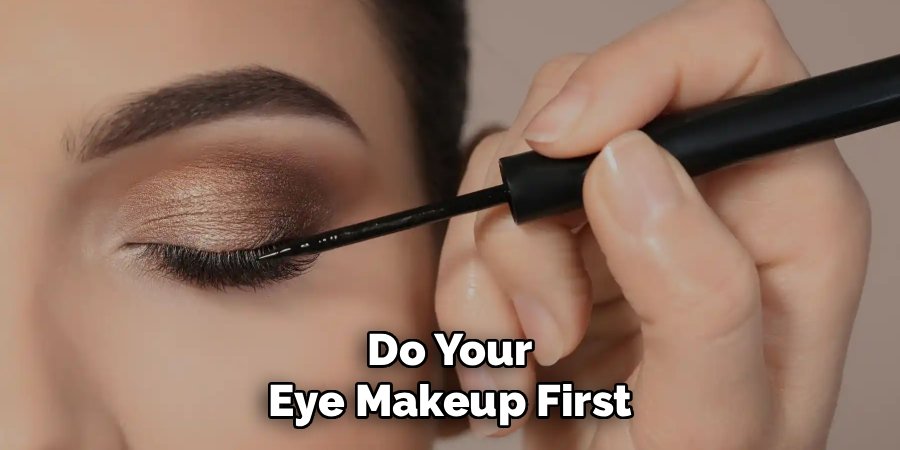
Curl your natural lashes and add a light coat of mascara. This helps your real lashes mesh with the false ones for a natural look.
Step 2: Measure and Trim the Lash
Hold the false lash strip up against your lash line to check the length. Most strips are made too long on purpose, so they’ll almost always need trimming.
Line up the inner edge of the strip with where your natural lashes start, about a quarter inch from your inner corner. Snip any excess off the outer end, never the inner end, so the lash tapers correctly.
Step 3: Give the Band a Bend
Take the trimmed lash and gently wrap it around your finger or the handle of your tweezers for a few seconds. This softens the band and curves it to match the natural shape of your eye.
A pre-bent band sits flush against your lash line instead of poking up at the corners. This one small step makes a huge difference in comfort and staying power.
Step 4: Apply the Glue
Squeeze a thin line of lash adhesive along the band. Focus a little extra on the two ends, since the corners are where lashes tend to lift first.
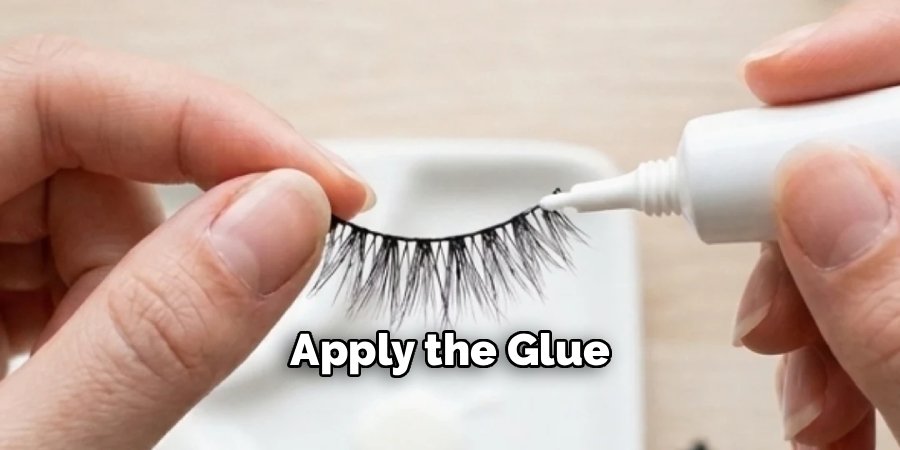
You can apply glue directly to the band or run a bit onto the back of your hand and drag the band through it. Either way, keep the layer thin. Too much glue is messy and takes forever to dry.
Step 5: Wait for the Glue to Get Tacky
This is the step everyone skips, and it’s the most important one. Wait about 20 to 30 seconds until the glue turns from white and wet to clear and sticky.
Tacky glue grabs instantly and holds better. Applying while it’s still wet leads to sliding, shifting, and a whole lot of frustration.
Step 6: Place the Lash
Using your tweezers, pick up the lash by the band and look down into your mirror with your chin lifted. Lay the center of the strip down first, as close to your natural lash line as you can get.
Then press down the inner corner, followed by the outer corner. Working center-out gives you the most control and keeps the lash from landing crooked.
Step 7: Press and Secure
Gently push the band into your lash line using your fingertips or the back of your tweezers. Hold for a few seconds to let it set.
If the corners feel loose, add a tiny dab of glue with a cotton swab and press again. Nudge the false lashes and your real lashes together so they look like one.
Step 8: Line and Blend
Once the glue is fully dry, run a line of eyeliner along the top of the lash band. This hides any visible glue or gaps and makes the whole thing look seamless.
A wing at the outer corner ties it all together if that’s your vibe. Finish with a light coat of mascara to marry your natural and false lashes, if needed.
Safety note: Your eyes are delicate, so handle glue with care. Never apply adhesive to your waterline (the inner rim of your eyelid where it meets the eye) or directly onto your actual eye. If you feel stinging, burning, or notice redness and swelling, remove the lashes right away and rinse gently. Always patch-test a new glue on your hand first, and toss any adhesive that smells off or has dried out. These are general beauty tips, not medical advice.
Pro Tips
A few insider tricks that separate a wobbly first attempt from a pro-level finish:
- Warm the band before applying. Holding the lash between your fingers for a moment makes the band more flexible and easier to shape to your eye.
- Buy black-band glue for dark looks. Dark-drying adhesive doubles as eyeliner and hides mistakes, while clear glue is better under lighter, more natural makeup.
- Trim in small snips. Cut a little at a time and re-check the fit. You can always take more off, but you can’t glue length back on.
- Reuse quality lashes. Peel off the dried glue from the band after each wear and store your lashes back in their tray. A good pair can last 10 to 20 uses.
- Keep tweezers dedicated to lashes. A curved lash applicator or clean tweezers gives you far steadier control than trying to place lashes with your fingertips.
Common Mistakes to Avoid
Even seasoned makeup lovers trip over these. Dodge them and your lashes will look better and last longer.
Skipping the tacky-wait. Rushing to place the lash while the glue is still wet is the number one reason falsies slide around and pop off. Give it those 20 to 30 seconds.
Using way too much glue. A thick, gloppy line takes forever to dry and oozes out from under the band. A thin line is all you need for a strong hold.
Placing the lash too far from your natural line. If there’s a visible gap between the strip and your real lashes, the whole thing looks fake and fluttery. Get that band snug against your lash roots.
Forgetting to trim. An untrimmed strip that’s too long will poke your inner corner, lift at the ends, and feel uncomfortable all day. Always measure and cut to fit.
Trimming the wrong end. The inner edge of most lashes is shorter and finer by design. Cutting there ruins the natural taper, so always trim from the outer end.
Not letting the glue dry before adding eyeliner or mascara. Touching a wet band drags it out of place. Be patient and let everything set first.
Frequently Asked Questions
How do you apply false eyelashes for beginners?
Start with a natural, lightweight strip lash rather than a dramatic style, since lighter bands are more forgiving and comfortable. Trim the lash to fit your eye, add a thin line of glue, and wait until it turns tacky before placing it.
Use tweezers instead of your fingers for better control, and lay the center of the strip down first, then press the corners. Practice on a low-stakes day before wearing them to a big event. The technique clicks faster than you’d think once you’ve done it a couple of times.
Which goes first, eyeliner or false eyelashes?
You can do a base coat of eyeliner before applying your lashes, but save your final liner for after the falsies are in place. Lining over the top of the band once it’s stuck down hides the strip and covers any leftover glue.
This two-part approach gives you a seamless, gap-free finish. If you only line once, doing it after placement usually looks cleanest.
How long do false eyelashes stay on?
With a quality lash adhesive applied correctly, strip lashes typically stay put for 8 to 12 hours, easily lasting through a full day or a long night out. The tacky-wait step and pressing the corners firmly are what give you that all-day hold.
Factors like humidity, oily lids, and how much you rub your eyes can shorten the wear time. If a corner lifts, a quick dab of glue fixes it on the spot.
Can you sleep in false eyelashes?
It’s best to remove your falsies before bed. Sleeping in them can tug on your natural lashes, trap bacteria, and irritate your eyes over time.
Gently peel the strip off from the outer corner, or soften the glue with a little oil-free makeup remover first. Taking them off nightly keeps both your eyes and your reusable lashes in better shape.
Ready to bat those gorgeous lashes? Grab your kit, take it slow on your first try, and you’ll be applying falsies like a pro in no time.
