
To apply cream blush, dab a small amount onto the apples of your cheeks (the round part that lifts when you smile), then blend upward toward your temples using your fingers, a brush, or a makeup sponge. Cream blush works best on bare skin or over liquid foundation, and a little goes a long way. Build the color slowly for a natural, lit-from-within flush.
Cream blush is having a moment, and for good reason. It melts into your skin for a fresh, dewy finish that powder just can’t match. If you’ve ever felt like your blush looks cakey or sits on top of your foundation, switching to a cream formula might be your new favorite trick.
Let’s break down exactly how to apply cream blush, not blotchy.
Why Cream Blush Is Worth Trying
Cream blush blends into the skin instead of sitting on top of it. That gives you a natural, second-skin look that reads more like a real flush than a dusting of pigment.
It’s especially flattering on dry or mature skin, since powder can cling to fine lines and dry patches. Cream formulas add moisture and a soft sheen instead.
The catch? Cream blush takes a slightly different technique than powder. Once you learn the basics, though, it’s genuinely faster and more forgiving.
What You’ll Need
You don’t need much to get started. Here’s what makes the process smoother.
- Cream blush — a stick, pot, or liquid formula in a shade that suits your skin tone. Start with a rosy or peachy shade if you’re unsure.
- A damp makeup sponge — great for a seamless, airbrushed finish. Dampen it and squeeze out the excess before using.
- A synthetic blush brush — a duo-fiber or dense synthetic brush blends cream products better than natural bristles.
- Your fingers — honestly, your hands are one of the best tools. The warmth helps the product melt into your skin.
- A hydrating primer — optional, but it helps cream blush glide on and last longer.
- Setting powder or setting spray — optional, to lock everything in place at the end.
A quick note on shades: fair skin tones often glow with soft pinks and peaches, medium tones suit warm corals and berries, and deeper tones look stunning in rich raspberries, brick reds, and bright oranges. Don’t be afraid of a bold color — cream blush sheers out beautifully.
How to Apply Cream Blush: 8 Step-by-Step
Follow these steps in order. The biggest secret is to start with less product than you think you need — you can always add more.
Step 1: Prep Your Skin
Start with moisturized skin. Cream blush grabs onto smooth, hydrated skin far better than dry, flaky patches.
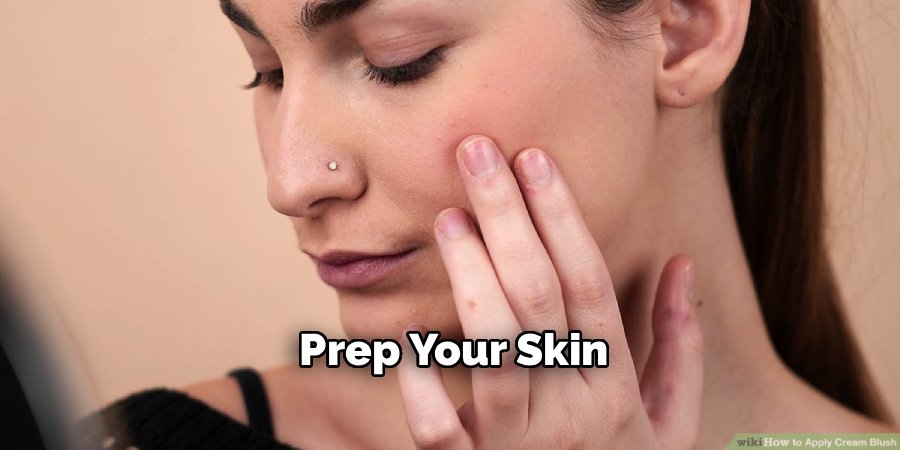
If you’re wearing foundation, apply your cream blush right after your base and before any powder. Cream on top of powder tends to look patchy, since the powder blocks it from blending in.
For a no-makeup look, you can apply cream blush straight onto bare, moisturized skin. It gives the prettiest natural flush this way.
Step 2: Find Your Placement
Smile in the mirror. The round part of your cheeks that lifts up is called the apples of your cheeks — that’s your starting point.
Applying color here mimics a natural flush and instantly brightens your face. For a more lifted, sculpted look, aim the color slightly higher, toward the top of your cheekbones.
Avoid going too low or too close to your nose, which can drag your face down or look flushed in an unflattering way.
Step 3: Apply a Small Amount
Less is more with cream blush. If you’re using a stick, swipe it once or twice directly onto your cheeks — or tap it onto the back of your hand first for more control.
For a pot or liquid, dab a tiny amount onto your fingertip. You want a small dot on each cheek to start, not a big stripe.
Remember, cream pigment is concentrated. A pea-sized amount usually covers both cheeks.
Step 4: Blend Quickly
Cream blush sets faster than powder, so work in small sections and blend right away. Use light, tapping motions first to spread the color, then gentle sweeping strokes to soften the edges.

Blend upward and outward toward your temples, following your cheekbone. This lifts the face and keeps the color from looking like a solid patch.
If you’re using your fingers, the warmth from your skin helps everything melt together seamlessly.
Step 5: Choose Your Blending Tool
Each tool gives a slightly different finish, so pick based on the look you want.
- Fingers deliver the most natural, skin-like result and warm the product as you blend.
- A damp sponge gives a soft, diffused, airbrushed finish and picks up any excess.
- A synthetic brush builds and blends color evenly for a slightly more polished look.
Whatever you choose, keep your touch light. Pressing too hard can wipe away the color you just applied.
Step 6: Build the Color Gradually
Step back and check your cheeks in good lighting. If you want more intensity, add another tiny bit of product and blend again.
Building in thin layers is the key to a natural finish. Piling on too much at once leads to a heavy, clownish look that’s hard to fix.
Keep layering until you reach the flush you love. Two light layers almost always beat one heavy one.
Step 7: Blend the Edges
Once you’re happy with the color, go back over the outer edges with a clean finger or the clean side of your sponge. This softens any harsh lines so the blush fades naturally into your skin.
There should be no obvious starting or stopping point. The color should look like it’s coming from within.
Step 8: Set If Needed
Cream blush can wear off faster than powder, especially on oily skin. To make it last, lightly dust a translucent setting powder over the top, or mist your face with a setting spray.
If your skin is dry, you can skip this step to keep that dewy glow. Setting is all about your skin type and the finish you prefer.
Safety note: Anytime you try a new makeup product, it’s smart to do a quick patch test first. Dab a little on your inner forearm and wait 24 hours to check for any redness or irritation before putting it on your face. This is general beauty guidance only — if you notice irritation that doesn’t settle, stop using the product and check with a professional.
Pro Tips for the Best Cream Blush Look
A few small adjustments can take your blush from good to glowing.
- Warm the product first. Rubbing a cream stick or dab of product between your fingers for a second makes it blend like a dream.
- Layer blush on the bridge of your nose. A tiny bit swept across your nose and cheeks gives a sun-kissed, just-came-back-from-vacation flush.
- Mix cream and powder blush. Apply cream first, then a matching powder blush on top for color that lasts all day without losing that natural base.
- Use blush as a multitasker. Many cream blushes double as a lip tint. Dab a little on your lips for an easy, coordinated look.
- Clean your tools regularly. Cream products build up on sponges and brushes fast, which can cause patchy application and breakouts.
Common Mistakes to Avoid
Even simple techniques have a few easy traps. Here’s what to watch for.
Applying over powder. Cream blush needs skin or liquid foundation to grip. Layering it over powder foundation or setting powder makes it grab and look blotchy. Always apply cream products before any powder.
Using too much at once. This is the number one mistake. Cream pigment is bold, so start tiny and build. Scrubbing off excess blush usually smears your foundation too.
Blending too slowly. Cream formulas set quickly. If you dot it on both cheeks and then start blending, one side may already be tacky. Work one cheek at a time.
Placing it too low. Blush that sits below the apples or too close to your nose can look droopy. Keep the color on and above the apples for a lifted effect.
Skipping moisturizer. Dry skin makes cream blush cling to flaky spots and refuse to blend. Always hydrate first for a smooth canvas.
Frequently Asked Questions
Do you apply cream blush before or after foundation?
Apply cream blush after foundation but before any powder. Liquid or cream foundation gives the blush a smooth, slightly tacky base to melt into, which helps it blend seamlessly. If you set your foundation with powder first, the cream blush will struggle to blend and can look patchy. For a natural, no-makeup look, you can also apply cream blush directly onto bare, moisturized skin — it looks gorgeous either way.
Can you use cream blush without foundation?
Absolutely, and many people prefer it that way. Cream blush looks especially natural on bare skin because it melts right in and mimics a real flush. Just make sure your skin is clean and moisturized first so the product blends smoothly instead of clinging to dry patches. This is a great option for quick, low-effort days when you want a healthy glow without a full face of makeup.
How do you make cream blush last longer?
The best trick is to layer a matching powder blush over your cream blush once it’s blended. The cream acts as a long-lasting base, while the powder locks the color in place. You can also lightly set your cheeks with translucent setting powder or a setting spray. Starting with a hydrating primer helps too, since it gives the blush something to grip. On oily skin, setting is especially helpful for all-day wear.
What can I use to apply cream blush if I don’t have a brush?
Your fingers are one of the best tools for cream blush, so a brush isn’t required at all. The natural warmth of your fingertips helps the product melt into your skin for a seamless finish. A damp makeup sponge also works beautifully and gives a soft, airbrushed effect. Just dab the color on, then blend with light tapping and sweeping motions until the edges disappear.
Ready to glow? Grab your favorite cream blush and give this technique a try — your cheeks will thank you.
