
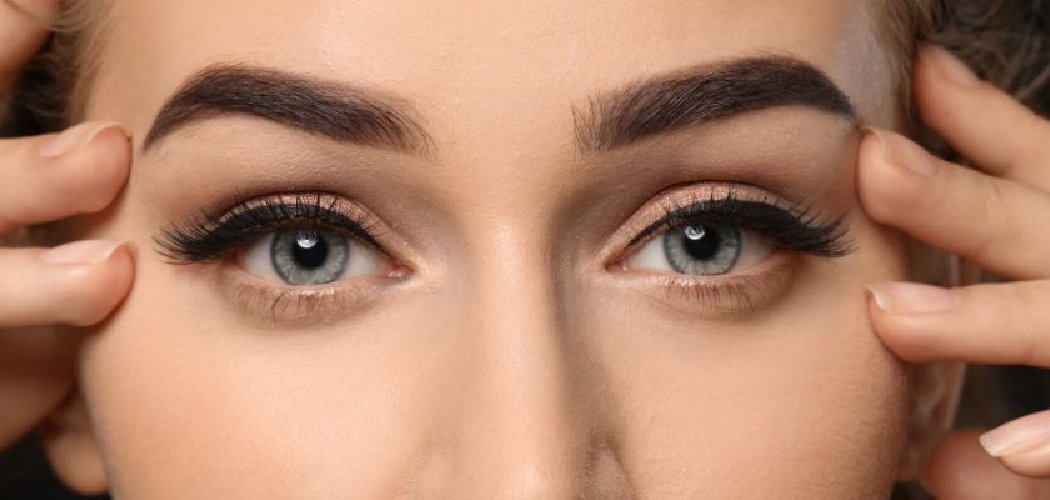
To do eyeliner with pencil, start with a sharp, creamy pencil and draw small dashes along your upper lash line, then connect them into one smooth line. Build the shape slowly from the inner corner outward, thickening toward the outer edge, and set it with a little eyeshadow so it lasts. Pencil eyeliner is the most beginner-friendly way to define your eyes, and with a steady hand you’ll get a clean, natural look in minutes.
If you’ve ever felt intimidated by liner, pencil is where you want to begin. It’s forgiving, easy to smudge or fix, and works for everyday wear or a bolder night-out vibe. Let’s walk through exactly how to do eyeliner with pencil.
What You’ll Need
You only need a few simple tools to line your eyes like a pro. Here’s the lineup that covers every look, from soft and smudgy to crisp and defined.
- Pencil eyeliner — a soft, creamy formula glides on best. Gel-based pencils tend to be smoother and longer-lasting than dry, waxy ones.
- A pencil sharpener — a clean, sharp tip gives you control and a precise line. Cosmetic sharpeners are made to fit standard eyeliner pencils.
- A spoolie or smudge brush — the little mascara-style wand (a “spoolie”) and a small smudge brush help you blend and soften the line.
- Eyeshadow in a matching shade (optional) — pressing powder over your liner sets it and helps it stay put longer.
- A cotton swab — perfect for quick cleanups and fixing any wobbly lines.
- Micellar water (optional) — a gentle cleanser that lifts away mistakes without tugging at the delicate eye area.
- An eyelash curler (optional) — curling first opens up your eyes and gives your liner a cleaner base to sit against.
Keep everything clean, especially anything touching your eyes. Wash reusable brushes regularly and wipe your sharpener blade so bacteria doesn’t build up.
How to Do Eyeliner with Pencil: 9 Step by Step
Follow these steps in order for a smooth, even line that flatters your eye shape. Take your time on the first few tries, and it’ll quickly become second nature.
Step 1: Sharpen Your Pencil
Start with a freshly sharpened tip. A sharp point gives you a precise, thin line, while a rounded, dull one creates a softer, smudgier effect.
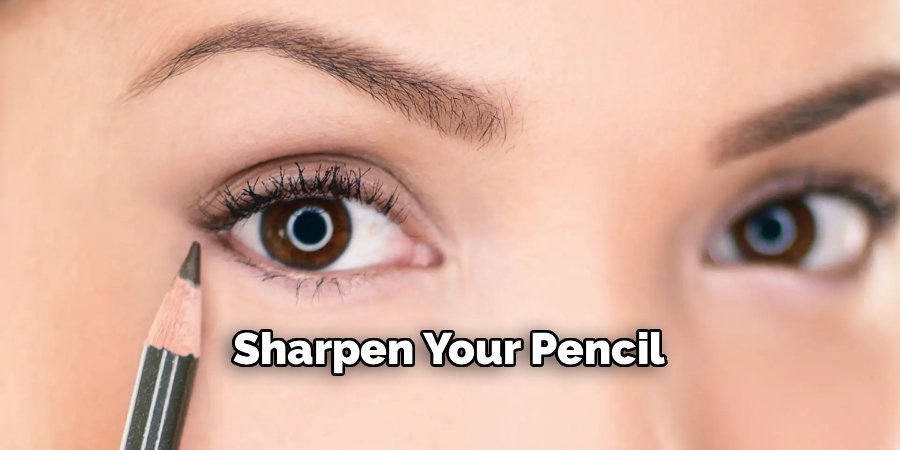
Sharpen just enough to get a clean edge. Over-sharpening a soft pencil can cause the tip to crumble, so go slow.
Step 2: Prep Your Eyelids
Sweep a little concealer or eyeshadow primer over your lids and let it set. This creates a smooth, oil-free base so your liner glides on and stays in place.
If your eyes tend to get oily, this step is key. Oil is the main reason pencil liner smudges and fades throughout the day.
Step 3: Warm Up the Pencil
Draw a small test line on the back of your hand first. This warms the formula slightly and shows you how much pigment comes off with each stroke.
It also lets you check the color payoff before it touches your eye. A quick swatch saves you from surprises.
Step 4: Start With Small Dashes
Look slightly downward into a mirror and steady your hand. Instead of one long stroke, draw tiny dashes right along your upper lash line, working from the inner corner outward.

Keep the pencil as close to the roots of your lashes as possible. Small dashes are far easier to control than one big swipe.
Step 5: Connect the Dashes
Once your dashes are in place, go back over them with light, connecting strokes to form one continuous line. Keep the line thin near the inner corner and let it gradually thicken toward the outer edge.
This natural taper flatters almost every eye shape. Build the thickness slowly rather than pressing hard.
Step 6: Tightline for a Fuller Lash Look (Optional)
Tightlining means gently pressing the pencil into the tiny gaps between your lashes at the base. This makes your lash line look denser without an obvious line of liner.
For this, look into the mirror and lift your upper lid slightly. Use tiny, careful dabs and avoid poking your eye.
Step 7: Line the Lower Lash Line (Optional)
For more definition, add a soft line under your lower lashes. Keep it light and smudged so it doesn’t look harsh or make your eyes appear smaller.
You can also line your waterline — the inner rim of your eyelid where it meets your eyeball. A nude or white pencil here brightens tired eyes, while black adds drama.
Step 8: Smudge or Sharpen the Finish
For a soft, smoky look, run a smudge brush or spoolie gently over the line while it’s still fresh. For a crisp finish, leave it as is and clean up the edges instead.
Use a cotton swab dipped in micellar water to tidy any uneven spots or smudges below the line.
Step 9: Set It With Eyeshadow
Press a matching shade of eyeshadow over your liner using a small brush. This locks the pencil in place and dramatically improves how long it lasts.
Black shadow over black liner deepens the look, while a soft brown keeps things natural. This one trick is the secret to smudge-proof pencil liner.
Safety note: You’re working right next to your eyes, so keep your movements slow and steady, and never line so deep that you poke your eyeball. Before trying a new pencil, do a quick patch test on your inner arm and wait 24 hours to check for irritation. This is general beauty guidance only — if your eyes sting, itch, water, or turn red, remove the product and stop using it. Avoid lining the waterline if you’re prone to eye sensitivity or wear contacts that bother easily.
Pro Tips for Perfect Pencil Eyeliner
These small tricks take your liner from okay to effortless.
- Chill your pencil first. Pop a very soft or melty pencil in the fridge for a few minutes. A firmer tip gives you a cleaner, more controlled line.
- Anchor your elbow. Rest your elbow on a table or counter while you draw. A steady base prevents shaky, wobbly lines far better than trying to hold your arm in the air.
- Use short strokes, always. Even experienced users rarely draw liner in one go. Small, connected strokes give you the most control and the smoothest result.
- Match your finish to your pencil. Waxy pencils are great for smudgy, smoky looks, while creamy gel pencils suit sharper, defined lines. Pick the formula for the effect you want.
- Set your lower line too. If your under-eye liner tends to travel down your face, dust a touch of eyeshadow over it and use a waterproof formula on the waterline.
Common Mistakes to Avoid
A few easy slip-ups can leave your liner smudgy, patchy, or unflattering. Here’s what to watch for.
Using a dull, dry pencil. A blunt tip drags across your lid and skips, giving you an uneven line. Sharpen regularly and choose a creamy formula.
Pulling your eyelid too tight. Stretching the skin sideways seems helpful, but the line snaps back crooked once you let go. Keep the skin relaxed as you draw.
Starting from the outer corner. Beginning at the outer edge often leads to a thick, heavy start. Work from the inner corner outward so the line tapers naturally.
Skipping the base. Applying liner over bare, oily lids almost guarantees smudging by midday. Always prime with concealer or shadow first.
Pressing too hard. Heavy pressure tugs at delicate skin and lays down too much product at once. Use a light hand and build up slowly.
Forgetting to set it. Pencil liner without powder on top fades and transfers fast. A quick dusting of matching eyeshadow keeps it locked in.
Making both eyes match perfectly on the first pass. Chasing symmetry too early leads to over-drawing. Get one eye roughly right, then match the second, and refine both at the end.
Frequently Asked Questions
How do you do pencil eyeliner for beginners?
Beginners should start with a soft, creamy pencil and draw small dashes along the upper lash line rather than one long stroke. Work from the inner corner outward, keeping the pencil close to your lashes, then connect the dashes into a single smooth line. Rest your elbow on a surface to steady your hand, and keep the line thin at the inner corner while thickening it slightly toward the outer edge. Fix any wobbles with a cotton swab and a little micellar water, then set the liner with matching eyeshadow so it lasts all day.
Do you put eyeliner on your waterline or lash line?
You can do both, and each creates a different look. Lining your upper lash line — the base of your top lashes — defines your eyes and makes lashes look fuller, and it’s the most beginner-friendly spot. The waterline is the inner rim of your lid that touches your eye; a nude or white pencil there brightens tired eyes, while a dark pencil adds intensity but can make eyes look smaller. If your eyes are sensitive or you wear contacts, skip the waterline and stick to the lash line to avoid irritation.
How do you keep pencil eyeliner from smudging?
The biggest secret to smudge-proof pencil liner is prepping and setting it. Start with a clean, oil-free lid by patting on a little concealer or eyeshadow primer, since oil is the main cause of smudging. After you draw the line, press a matching shade of eyeshadow over it with a small brush to lock it in place. For your waterline and lower lash line, reach for a waterproof or long-wear pencil, and always let each layer set before you open your eyes fully.
What kind of pencil eyeliner is easiest to use?
A creamy, gel-based pencil is the easiest to work with because it glides on smoothly without dragging or skipping. These formulas give you enough time to smudge and adjust the line before they set, which is perfect while you’re still learning. Very hard, waxy pencils can pull at the delicate eye area, while extremely soft ones melt and smear too fast. Look for a pencil labeled “creamy,” “gel,” or “long-wear,” and keep it sharpened for the best control.
Grab your favorite pencil, steady your hand, and give these steps a try — beautifully defined eyes are just a few small strokes away.
