

To get pillow lips, you’ll want to plump, define, and highlight your natural lip shape so it looks soft, full, and cushiony from every angle. Start with a hydrating lip plumper, slightly overline your edges with a nude liner, then layer a satin lipstick and a dab of light-reflecting gloss in the center. The result is that pillowy, kissable pout that looks fuller without any needles or filler.
Pillow lips are all about softness and volume. Think plush, rounded, slightly overfilled lips with a subtle glow right in the middle. It’s a look that’s taken over social media, and the best part is you can fake it beautifully with a few smart products and techniques.
In this guide, we’ll cover exactly what to grab, walk through each step, and share the little tricks that make the difference. You’ll learn how to get pillow lips, line, and shine your way to a fuller-looking pout.
What Are Pillow Lips, Anyway?
Pillow lips describe a full, soft, cushioned lip look, almost like your lips have a gentle “puff” to them. They’re rounded rather than sharp, with plenty of dimension and a soft-focus finish.
Some people are born with naturally plush lips. But if you weren’t, don’t worry. With the right layering and a couple of clever makeup tricks, anyone can create the illusion of a fuller, pillowy pout.
What You’ll Need
Gather everything before you begin so you can layer smoothly without stopping halfway. Each product plays a specific role in building that cushioned effect.
- Lip scrub — buffs away flaky skin so everything glides on evenly
- Hydrating lip balm — softens and preps your lips for color
- Lip plumping gloss or serum — gives a temporary fuller look and a subtle tingle
- Nude or “your lips but better” lip liner — defines and gently expands your shape
- Satin or creamy lipstick — adds color with a soft, non-flat finish
- Light-reflecting or high-shine lip gloss — creates that glowy center for extra dimension
- A shimmery lip topper or highlighter (optional) — adds a plush highlight to the cupid’s bow
- A small lip brush — for precise blending and clean edges
A quick shade tip: pick a liner and lipstick within one or two shades of each other. Matching tones keeps the whole look seamless and natural, which is key for that soft, pillowy vibe.
10 Step-by-Step: How to Get Pillow Lips
Follow these steps in order for the fullest, softest results. The layering is what builds dimension, so try not to skip ahead.
Step 1: Exfoliate for a Smooth Base
Start by gently buffing your lips with a lip scrub or a soft, damp toothbrush. This lifts away dry, flaky patches that can make lips look thin and uneven.
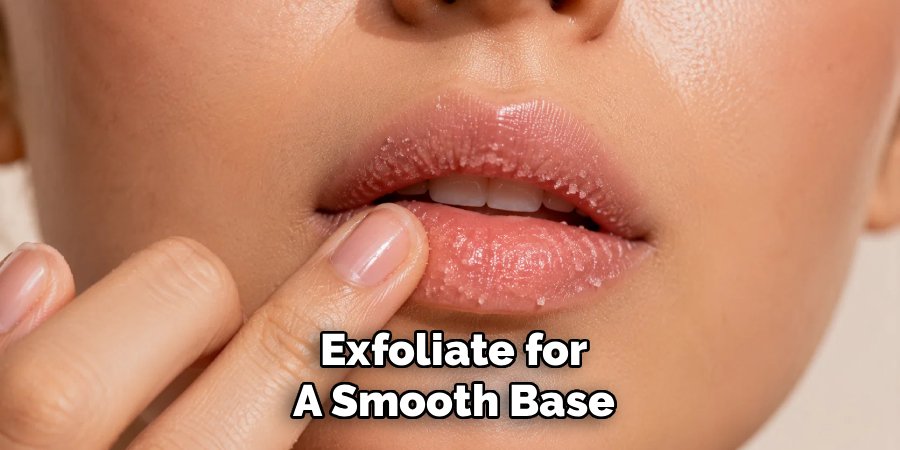
Smooth lips reflect light better, which instantly reads as fuller. Wipe off any leftover scrub with a tissue before moving on.
Step 2: Hydrate and Prime
Swipe on a nourishing lip balm and let it soak in for a minute or two. Well-hydrated lips look plumper and take color more evenly.
Then blot off any excess with a tissue. You want soft, conditioned lips, not slippery ones, since too much balm can stop your liner and lipstick from gripping.
Step 3: Apply a Lip Plumper
Now dab on your lip plumping gloss or serum. These products often contain ingredients that create a light tingling sensation and boost blood flow, giving your lips a temporary fuller, poutier look.
Let it work for a minute or two. A little goes a long way, so don’t overdo it, especially if your lips feel sensitive.
Step 4: Overline Your Lip Edges
Take your nude liner and gently trace just outside your natural lip line. This technique is called overlining, and it means drawing slightly beyond your real edge to create the illusion of a fuller shape.
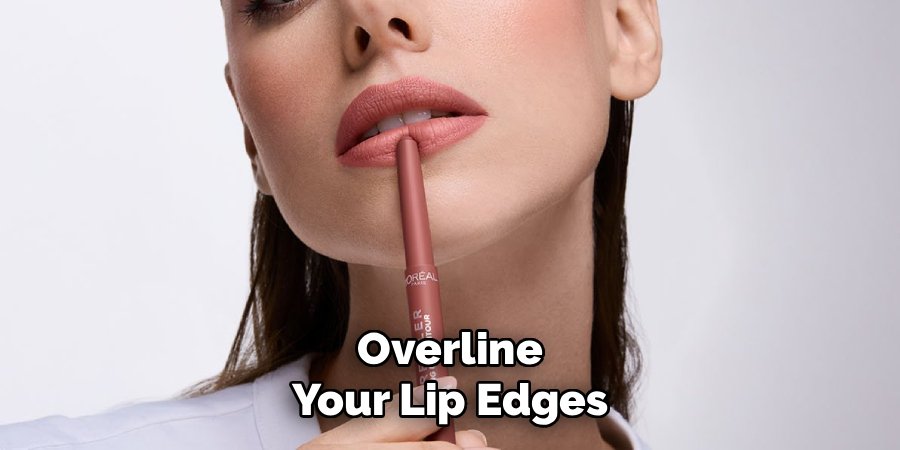
Keep it subtle here. Aim for about a millimeter past your natural line, focusing on the fullest parts, like the center of your top and bottom lip. Use short, feathery strokes so it looks soft rather than harsh.
Step 5: Shape the Cupid’s Bow and Corners
Move to your cupid’s bow, the little “M” shape in the center of your upper lip. Define those two peaks lightly, but keep them rounded rather than sharp for that soft, pillowy effect.
At the corners, don’t extend the liner too far out. Overlining the outer corners can make lips look stretched instead of plush, so keep your focus on the center.
Step 6: Fill In With Liner
Color in your entire lip with the liner, not just the edges. This creates a base that grips your lipstick and helps everything last longer.
Filling in also blurs the line between your natural lip and the overlined edge. That soft transition is what sells the fuller look without it looking obvious.
Step 7: Layer Your Lipstick
Swipe on a satin or creamy lipstick right over your lined base. Satin and creamy formulas add a touch of softness and dimension, unlike flat mattes that can make lips look smaller.
Press your lips together to spread the color evenly. Use a small lip brush to tidy up the edges so they stay crisp and clean.
Step 8: Add Gloss to the Center
Here’s the magic step: dab a light-reflecting or high-shine gloss right in the center of your lips. Concentrating the shine in the middle catches the light and creates a rounded, three-dimensional pout.
Keep the gloss mostly central rather than all over. That focused glow is exactly what gives pillow lips their plush, cushioned appearance.
Step 9: Highlight the Cupid’s Bow (Optional)
For an extra-plush finish, tap a tiny bit of shimmery lip topper or highlighter onto your cupid’s bow. This lifts and accentuates the top of your lip.
Blend it softly with your fingertip. Just a whisper of shimmer here makes your upper lip look fuller and more defined.
Step 10: Set and Check the Light
Take a final look in natural light to check your shape and balance. Make sure both sides match and the gloss is centered.
If you want the color to last longer, blot gently with a tissue and reapply a thin layer. Then add your gloss back on top for that fresh, dewy finish.
Pro Tips for Fuller-Looking Lips
These little tricks take your pout from nice to next-level. Keep them handy for your next lip look.
- Warm your liner first. If your pencil feels stiff, rub the tip gently on the back of your hand for a second. It’ll glide on more smoothly and blend easier.
- Use lighter shades in the center. Dabbing a slightly lighter lipstick or gloss in the middle of your lips creates depth, making them look rounder and fuller.
- Don’t fear a little shimmer. A touch of light-reflecting topper on the center and cupid’s bow adds instant dimension that flat color can’t.
- Stick to soft, rounded lines. Sharp, angular liner reads more “sculpted” than “pillowy.” Keep your edges gently rounded for that plush effect.
- Overline in moderation. A subtle overline looks natural and full. Going too far past your natural line can look obvious and less flattering.
Common Mistakes to Avoid
Even with the right products, a few slip-ups can flatten your look. Here’s what to watch for.
- Skipping lip prep. Dry, flaky lips look thinner and make color patchy. Always exfoliate and hydrate first.
- Overlining too heavily. Drawing way outside your natural line looks unnatural and can make lips appear stretched. Keep it to a millimeter or so.
- Using a flat matte all over. Matte finishes can make lips look smaller and less dimensional. Reach for satin or creamy formulas, and add gloss for volume.
- Applying gloss everywhere. Spreading shine across the whole lip loses that rounded center effect. Concentrate the gloss in the middle.
- Mismatched liner and lipstick. A liner that’s much darker than your lipstick creates a harsh outline. Keep the two within a shade or two of each other.
- Forgetting to blend. Hard lines between liner and lipstick look obvious. A quick blend with a brush or fingertip keeps everything soft and seamless.
A Quick Safety Note
Your lips are delicate, so treat them gently throughout the process. Don’t scrub too hard during prep, and go easy with plumping products if your lips feel sensitive or irritated.
Before trying a new lip plumper, liner, or gloss, it’s smart to do a patch test. Dab a small amount on the skin near your lips or on your inner arm and wait about a day to check for any reaction. If you notice redness, itching, swelling, or lasting stinging, stop using the product. This is general beauty-routine caution, not medical advice, so check with a professional if you have ongoing concerns.
Frequently Asked Questions
How do you make your lips look fuller without filler?
You can fake fuller lips with a few makeup tricks. Start by exfoliating and hydrating, then use a lip plumping gloss for a temporary boost. Lightly overline your edges with a nude liner, fill in the whole lip, and layer a satin lipstick on top. Finish with a light-reflecting gloss in the center and a touch of highlighter on your cupid’s bow. Together, these steps create a soft, plush, fuller-looking pout, no needles required.
Does lip plumping gloss actually work?
Lip plumping glosses do create a temporary fuller look, though results are short-lived. Many contain ingredients that gently stimulate the lips, causing a mild tingle and a slight swell that plumps them up for a while. The effect usually fades after an hour or two. If your lips feel overly sensitive, use less product or skip it and rely on liner, lighter shades, and center gloss instead.
What lip products make lips look pillowy and soft?
For that pillowy look, reach for satin or creamy lipsticks rather than flat mattes, since they add dimension and softness. A “your lips but better” nude liner helps define and subtly expand your shape. A high-shine or light-reflecting gloss in the center creates a rounded, cushioned glow. A shimmery lip topper on the cupid’s bow adds an extra plush finish. Together, these build that soft, full effect.
Is overlining your lips bad for them?
Overlining with makeup is completely safe for your lips, since you’re only using liner and lipstick, not anything invasive. The key is keeping it subtle and blended so it looks natural. Just be gentle during application, avoid tugging at the delicate skin, and always remove your lip products properly at the end of the day. If any product causes irritation, stop using it and patch-test new ones first.
Ready to plump up that pout? Grab your favorite liner, gloss, and a light hand, then layer your way to soft, cushiony pillow lips you can recreate any day of the week.
